VIDcredentials Studio API
VIDcredentials Studio API is an API to manage the lifecycle of the credentials in the VIDchain platform. It allows issuing credentials in different ways, revoke, check the status of a credential... The operations performed through the API can be monitored through the VIDcredentials Studio Portal.
The following content is a guide to help show how an integrator can integrate with the VIDCredentials Studio API. First, it reviews some concepts that are important to be clear about, and then we provide an integration example using Postman. The Postman tool has been chosen for its ease of use and because we believe it is a quick and easy way to start interacting with the API. However, you can choose the way that best suits your needs to perform the integration. It is not necessary to use Postman to integrate with VIDcredentials Studio API. You may use it to experiment and understand its services. For more information about API requests and detailed information about their parameters please refer to the OpenAPI section.
Glossary
This section clarifies various concepts found throughout the API to avoid confusion.
Credentials
There are three different operations that can be used to issue credentials, but the issuance process is different for each of them.
Credential
A Credential is issued directly to the user through a push notification into the VIDwallet, but it requires knowing Decentralized Identifier (DID) associated with the holder in the Wallet. This process is characterized by automation, allowing for the issuance of credentials without requiring holder intervention. Holders receive their credentials seamlessly through a push notification mechanism.
Credential Order
In contrast, a Credential Order follows a different workflow where the issuance method involves an automated email sent to the holder. Upon placing an order, holders receive an email notification prompting them to take action and retrieve the ordered credential. Unlike the direct push notification of credentials, the order process requires holders to actively respond to the email notification to obtain the credential.
Credential Request
A Credential Request, on the other hand, introduces manual validations step into the issuance process. Before sending the email notification to the holder, an operator manually validates the user's request through VIDcredentials Studio portal. Then, the holder will receive a consent document to be signed to confirm the desire of receiving the credential. This additional layer of validations ensures a very controlled issuance process, where an operator reviews and verifies a request and the holder provides consent of issuance before triggering the email notification. This method prioritizes a validated and controlled approach to credential issuance.
Identity verification method
When an issuer wants to provide a credential and notify the user through an email, it is highly recommended to make sure that the individual gathering the credential to be issued is verified. The identity verification method defines how this individual is identified. Currently, VIDcredentials Studio offers the possibility to identify the holder by:
- Email: When the holder receives the email, in order to gather the new credential issued, the holder will have to present an Email credential to show the ownership of certain email credential account previously set by the issuer.
- KYC: When the holder receives the email, in order to gather the new credential issued, the holder will have to present a KYC credential to show the ownership of a national ID with certain ID number account previously set by the issuer.
- Face to Face (F2F): The holder and the operator approving the request are together in place, then the operator not only validates a credential request but also the holder identity.
Notice that the holder has access to VIDissuer to receive Email and KYC credentials free of charge.
Values for the identityVerificationMethod field in the request body are as follows:
...
 "identityVerificationMethod" : {
    "type" : "EmailCredential",
    "requestedInfo" : [
        {
        "path" : "email",
        "value" : "test@gmail.com"
        }
      ]
     },
...
 "identityVerificationMethod" : {
    "type" : "VidKycCredential",
    "requestedInfo" : [
        {
        "path" : "personalNumber",
        "value" : "123456789A"
        }
      ]
     }
...
 "identityVerificationMethod" : {
    "type" : "F2F",
    "userData" : {
        "userName" : "CRISTINA COCA",
        "userLegalId" : "123456789A",
        "deviceId" : "97d8bd0b-3bdd-4efb-...",
        "docGUI" : "9ef2555a-a16f-4d36-..."
       }
     }
Credential types
A credential type defines which attributes are within certain kind of credential. Each issuer using VIDcredentials Studio has to define its own credential types. The entity has to provide its credential type definitions to our Support Team by opening a support ticket. In case of using an already defined credential schema, it is enough to provide the schema or a reference to it.
Postman integration
Postman Utils
This section has the purpose to help those integrators that does not have many experience using Postman and may need some help to start using it. To use this collection you will need to import the collection and the environment before executing any request. If you are already familiar with Postman you can just import the collection and the environment and skip these explanations.
Import the collection
In Postman, a "collection" is a container that allows you to organize and group together a set of related API requests, pre-request scripts, tests, and other elements. Collections are a fundamental feature in Postman and play a crucial role in structuring and managing your API testing workflows.
Instructions:
- Download the Postman collection VIDCredentials Studio [Integrators].json
- Open Postman and click the "Import" button.
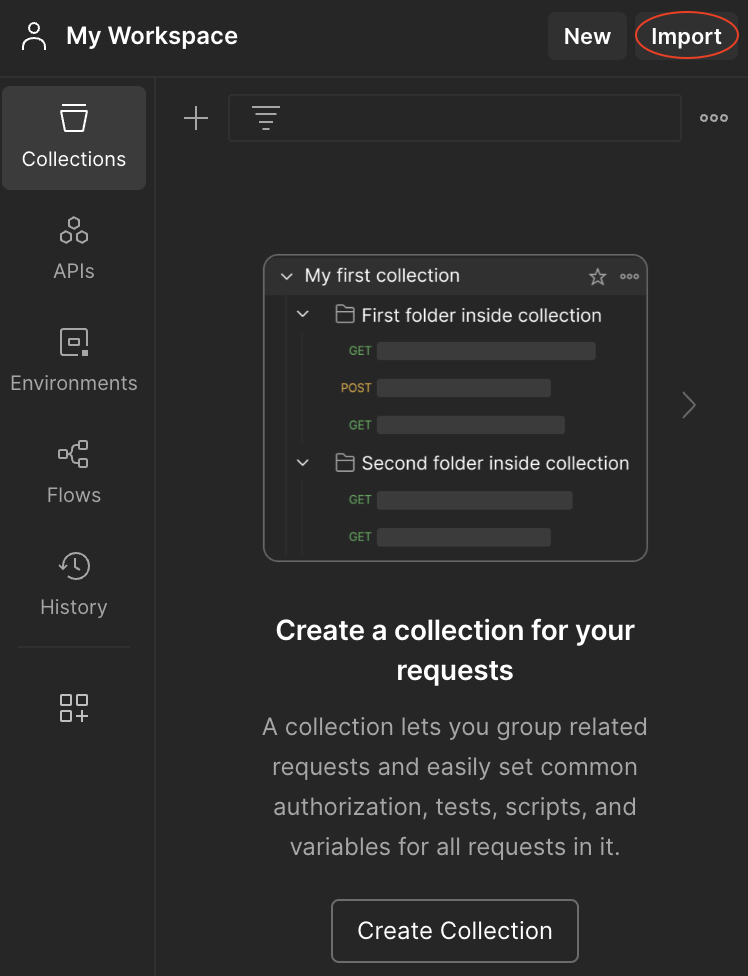
- Select the downloaded collection file and the imported collection will be available in your Postman workspace.
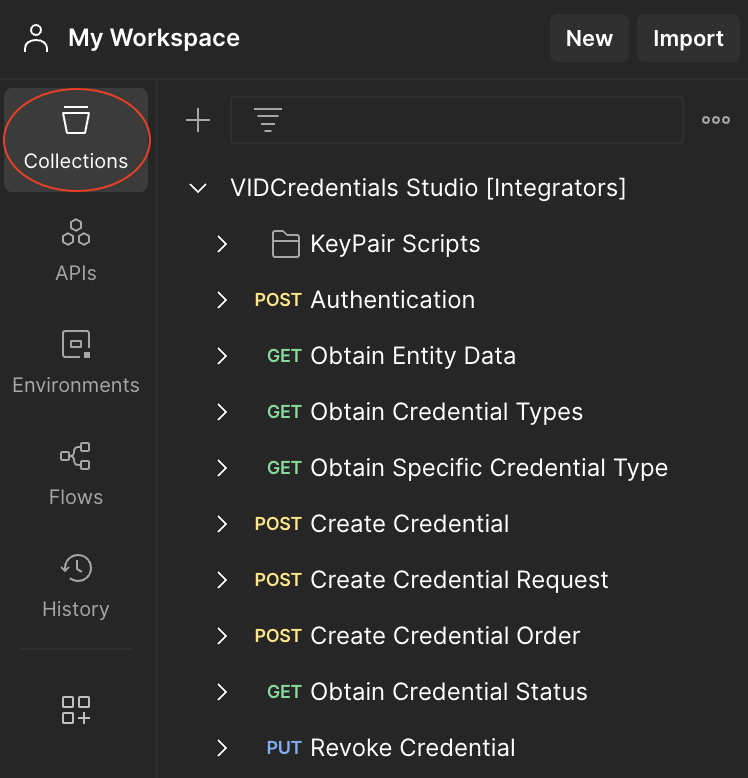
- Navigate to the "Collections" tab in the left sidebar, and you will see all the available requests inside the collection.
Import the environment
In Postman, an "environment" refers to a set of key-value pairs that represent variables. These variables can be used to store and reuse values across multiple requests, making it easier to manage and maintain consistency in your API testing workflows.
Instructions:
- Download the Postman environment Staging [Integrators].json
- Open Postman and click the "Import" button.
- Select the downloaded environment file and the imported environment will be available in your Postman workspace.
- Navigate to the "Environments" tab in the left sidebar, and you will see all the available environment variables.
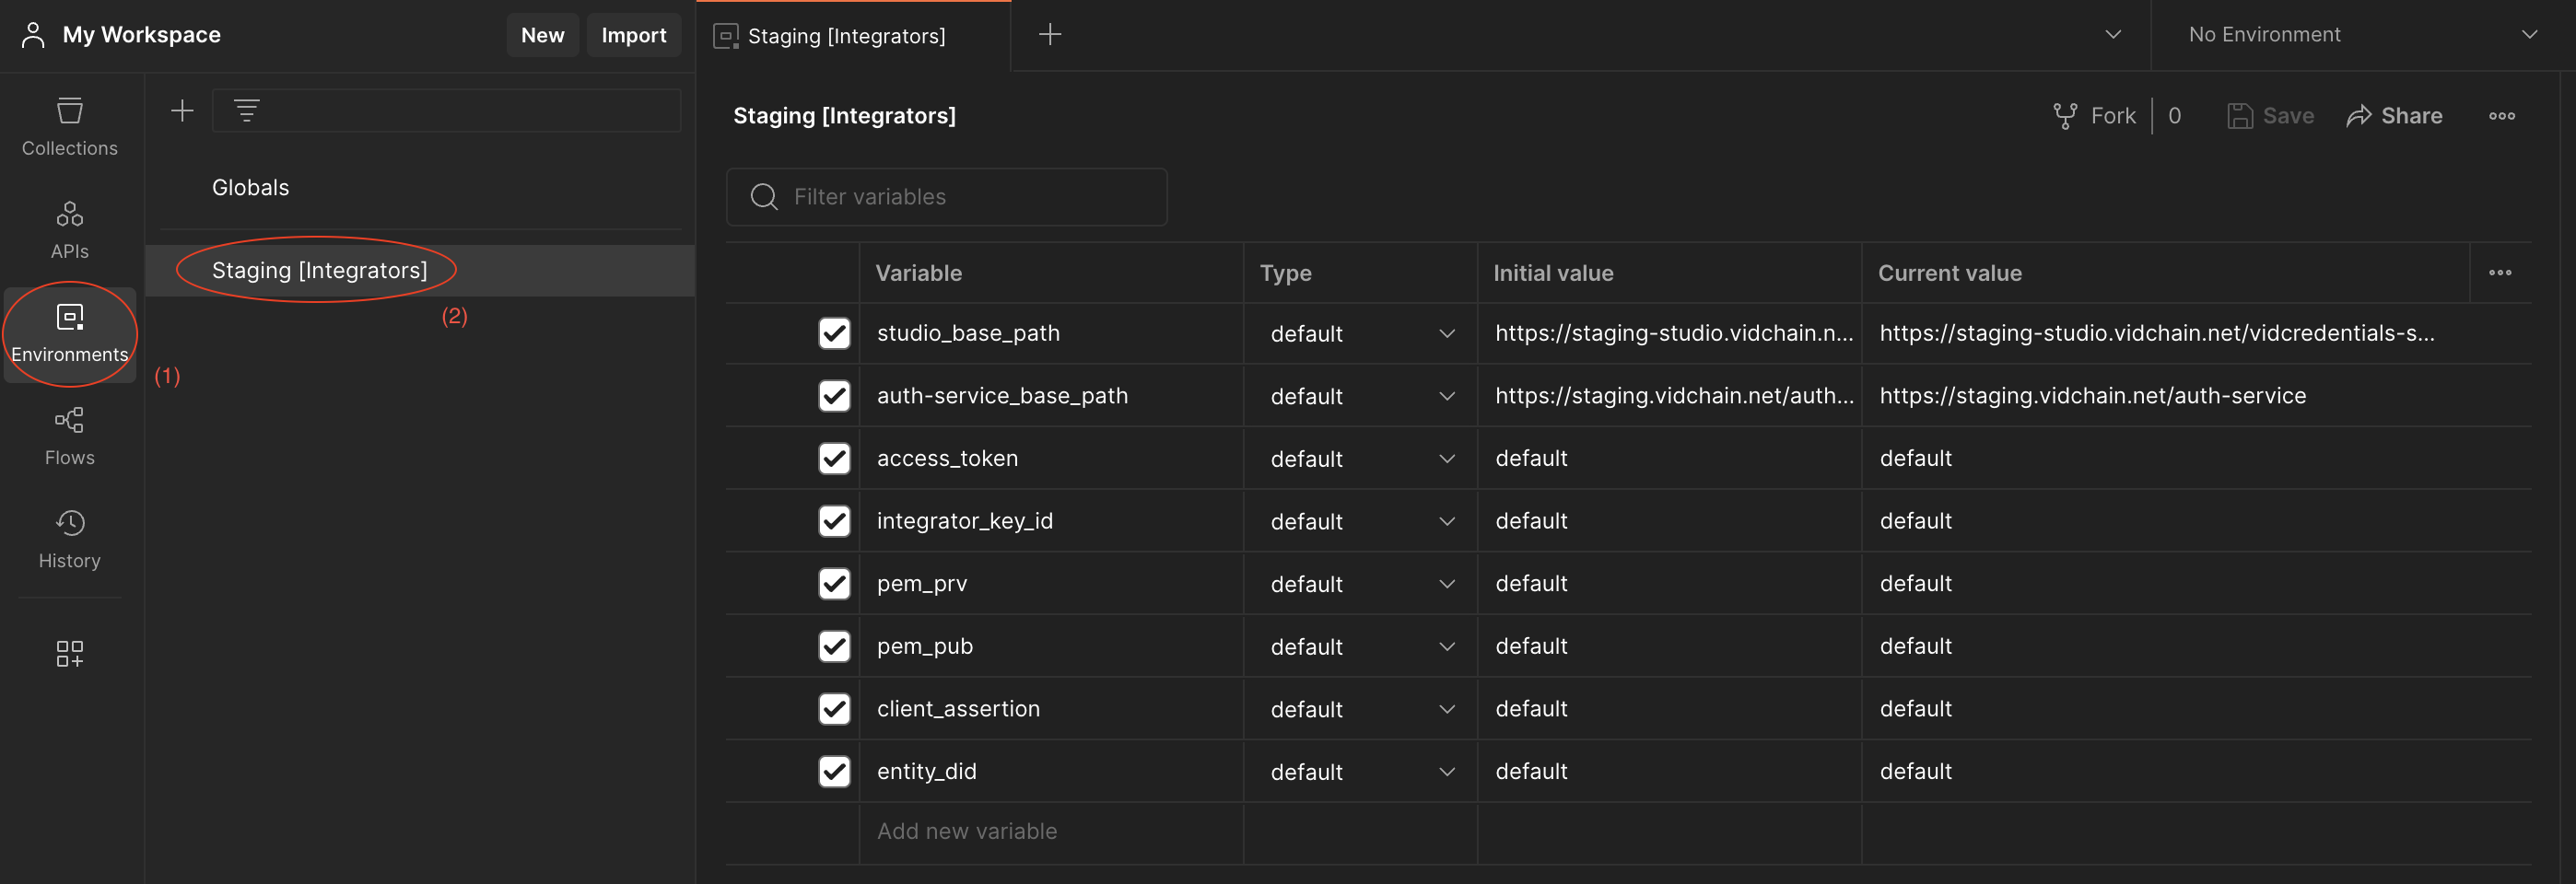
- Select this environment to start using it.
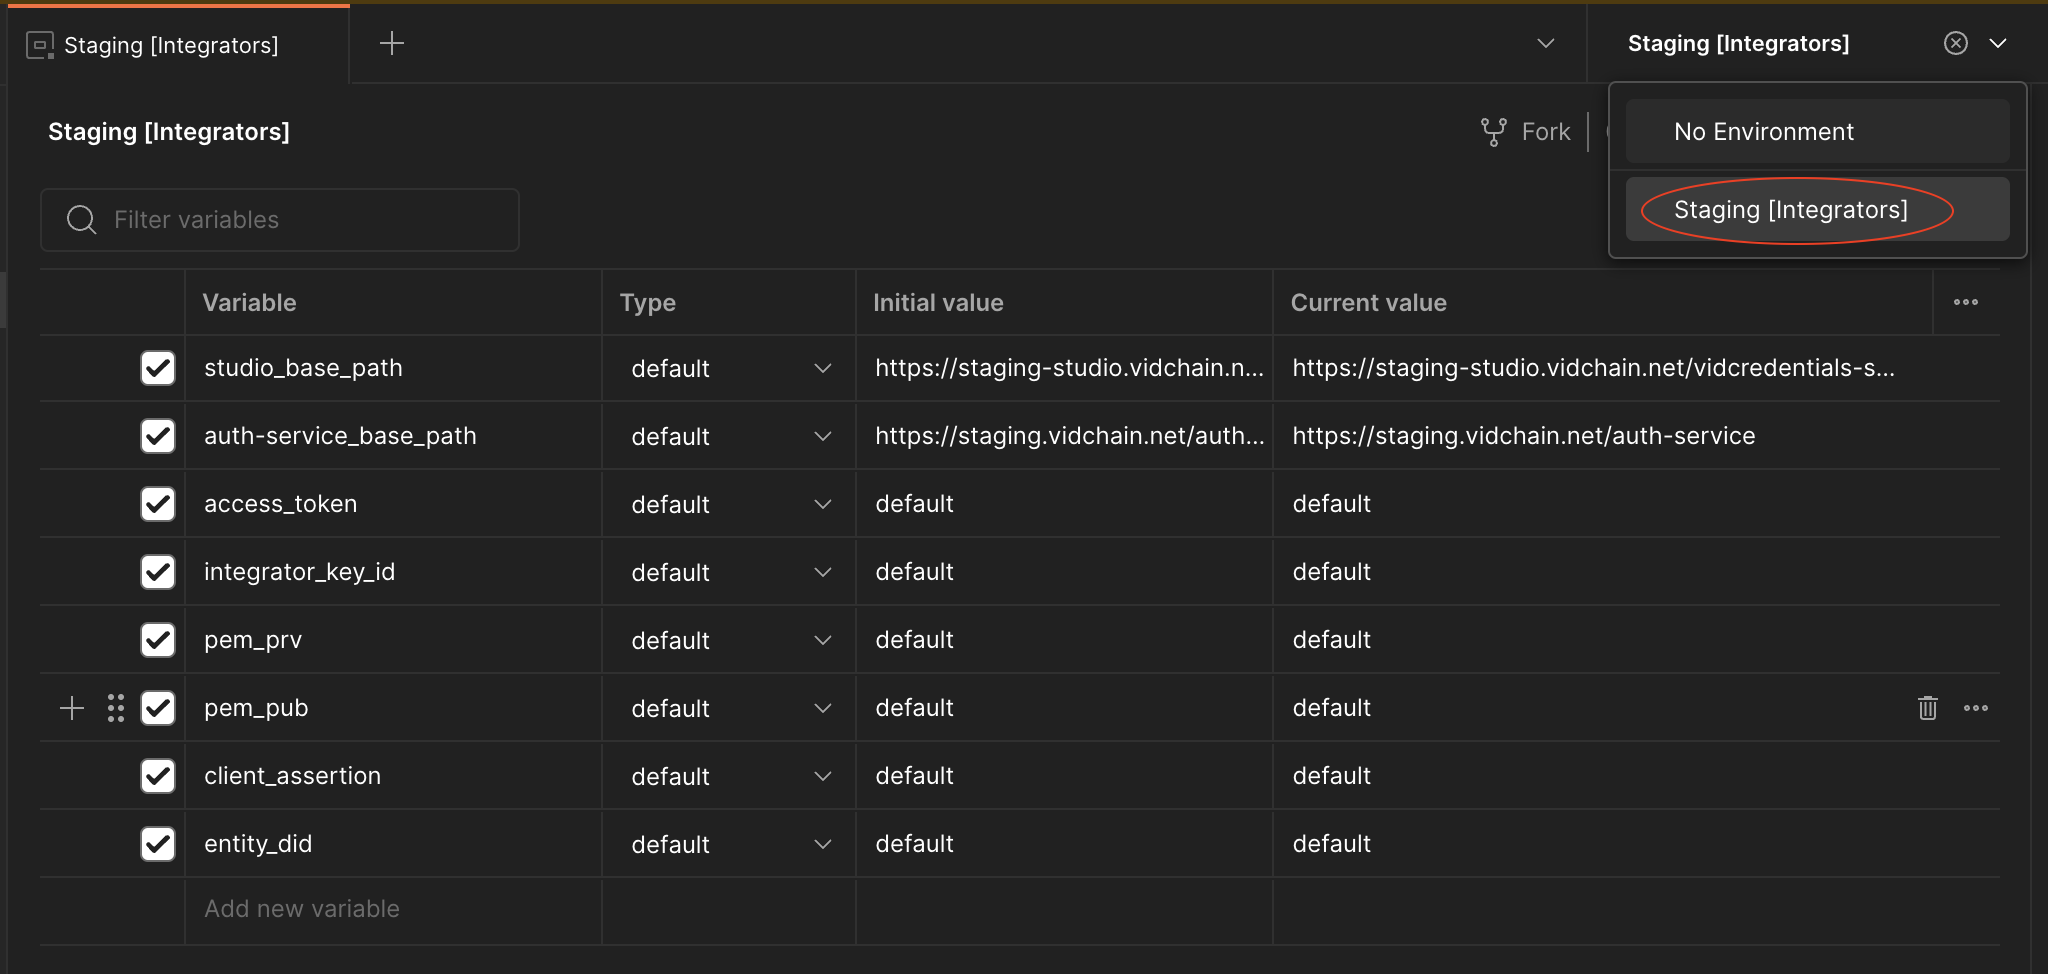
Explanation of Environment Variables:
- studio_base_path: This variable stores, as its name suggests, the base path of the url to be called when interacting with the VIDCredentials Studio API.
- auth-service_base_path: Stores the base path of the url to be called when interacting with the Authentication Service. It is essential for the authentication process.
- access_token: Used to store the authentication JWT received from the Authentication Service. It will be required for any request to the VIDCredentials Studio API.
- entity_did: Stores the DID of the integrator.
- pem_prv: Stores the private key in PEM format (needed for generating the client assertion).
- pem_pub: Stores the public key in PEM format (needed for generating the client assertion).
- integrator_key_id: Stores the integrator key ID provided by the Support Team (needed for generating the client assertion).
- client_assertion: It is used to store the JWT client assertion for further authentication (needed for requesting authentication).
note
If you are not familiar with some of the variables names mentioned above, don't worry, we will explain them in the following section.
Authentication
All requests pointing to the VIDCredentials Studio need an Authorization header with a Bearer Token in order to prove your identity. For this purpose, we provide you with the necessary tools to authenticate yourself and make the desired requests. For the authentication process there is a request inside the collections named "Authentication" which expects a client assertion in JWT format. If you know how to generate this client assertion and you prefer to generate it be your own, feel free to skip this steps but bear in mind that you will need to ask the Support Team to register your public key in the system. Otherwise, the following are a set of tools to guide you on how to generate the client assertion for the further authentication.
note
Whether you generate the client assertion by your own, or generate it with the provided tools, note that the access_token is automatically stored in the corresponding environment variable. Therefore, after a successful authentication request you can already start using the rest of the collection requests.
KeyPair Scripts
This folder is provided to generate the client assertion needed in the authentication request. The first step to generate it is to create a pair of keys to be able to sign the client assertion. To do so, there are two possible options that are described below. Whether you generate the KeyPair with the first option or the second, you will need to execute the common step described after these options.
Option 1
The first option consist of generating the KeyPair with the provided scripts. By doing it this way, you forget about having to implement a script for key generation. The steps you have to follow are:
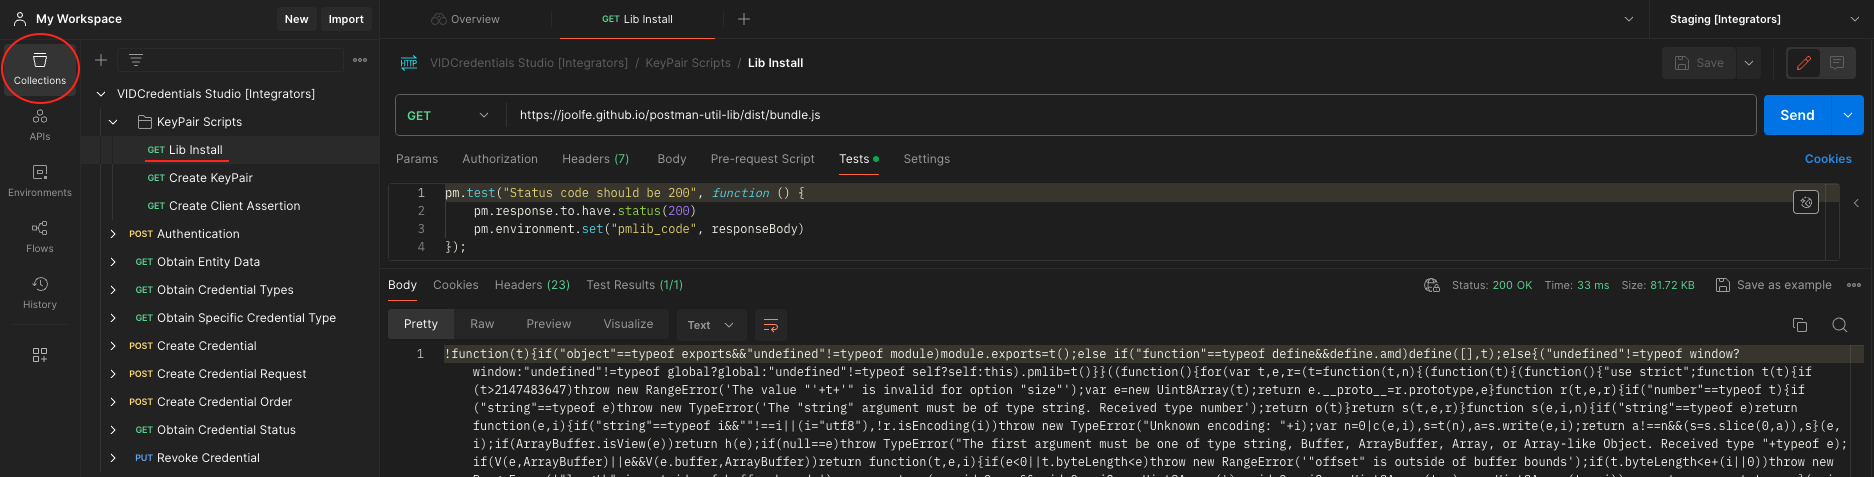
- Run the Lib Install request. This request will store the bundle.js of the "postman-util-lib" library to an environment variable named pmblib_code. The mentioned library is a common crypto utility library to be used from Postman Pre-request and Tests script tabs. Note that the response to this request is not important and no action is required, since the variable storage will be performed automatically.
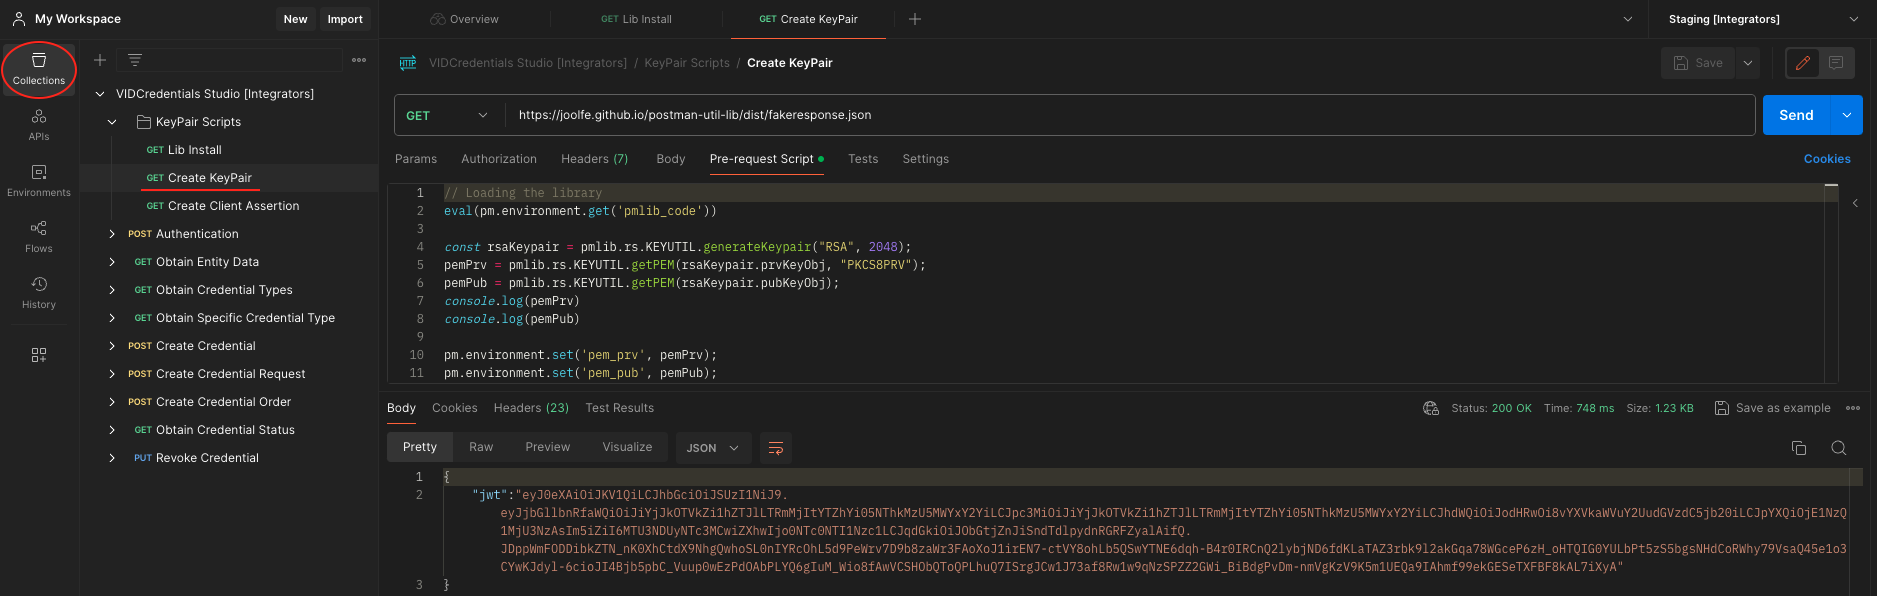
- Run the Create KeyPair request. By doing this you will generate an RSA KeyPair with the library installed before and store the generated keys in PEM format to the environment variables pem_prv and pem_pub. Again, no action is necessary here, since the storage of variables is automatic.
Option 2
Alternatively, you can generate the KeyPair by your own if you prefer it. Just note that the supported key algorithms are ES256K and RS256. Once you have the KeyPair you will need to store it in PEM format into the environment variables named as pem_prv and pem_pub.
important
Remember to click the save button at the top right after adding the variables.

Common
Now that you have a pair of keys, you can create and sign the client assertion by following these steps:
- Ask the Support Team to register your public key into the system. You can find your public key in the environment sections under the pem_pub variable. If you are not registered in the system you will not be able to execute the following requests to the VIDCredentials Studio. After being accepted and registered, the Support Team will return an Integrators Key ID.
- Store the Integrators Key ID as an environment variable named integrator_key_id.
important
Remember to click the save button at the top right after adding the variable.

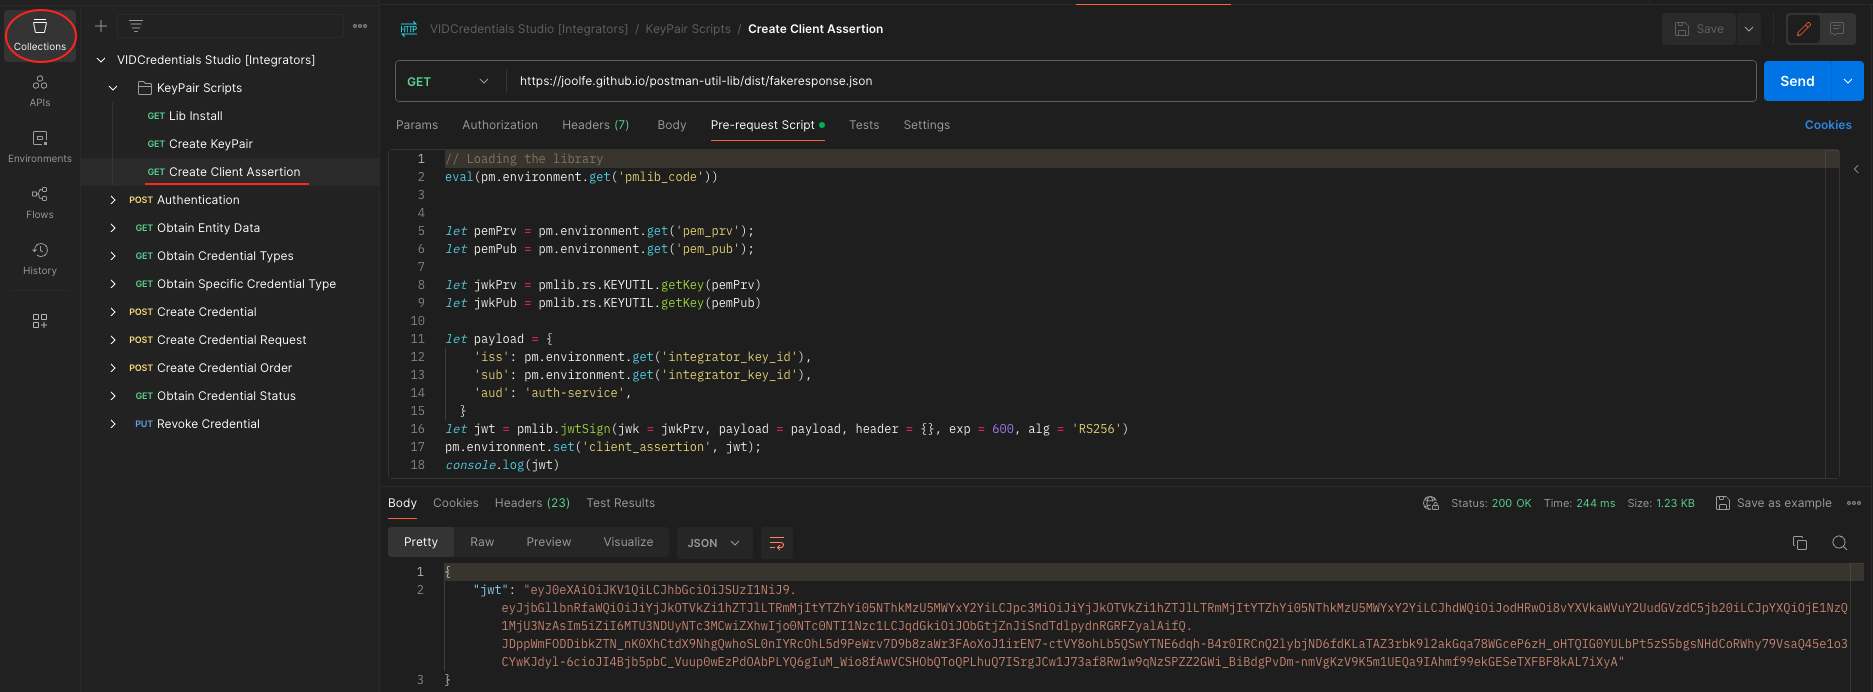
- Run the Create Client Assertion request. This request will sign the client assertion in JWT format using the previous generated keys. Then, the JWT will be stored automatically in an environment variable named client_assertion, and you will be ready to use the authentication request. Again, no action is necessary here, since the storage of variables is automatic.